Have you ever desired a look of wood on cardboard? You might be surprised at how simple it is! This blog post will teach you how to create a look of wood grain on cardboard. These easy steps will allow you to achieve an amazing wooden effect that works well for any project.
With just a few easy steps, you can create an authentic wood grain pattern that will fool everyone’s eye. Thus, continue reading for instructions on how to make cardboard look like wood if you’re looking for a quick and simple way to add some realistic work to your crafts.
What Tools and Supplies You’ll Need:
1. Cardboard:
To begin with, you must have a piece of smooth, clean cardboard. It is important to ensure that the surface is free of any holes or crashes because this will influence the outcome.
2. Brown Paint:
Select a brown paint that corresponds with the color you want your cardboard to have. The best paint for this project is acrylic.
3. Black Paint:
A tiny bit of black paint will also be needed to give your wood grain pattern more depth and texture.
4. Paintbrush:
For this project, an average-sized a brush of paint will be most useful.
5. Pencil:
To outline the wood grain structure before painting, you’ll need a pencil.
6. Scissors:
Using scissors, you can cut out any shapes or designs you want on the cardboard.
7. Paper Towel:
To achieve a more realistic look, you will need to dab and blend the paint with a paper towel or cloth.
10 Step-by-Step Guide: How to Make Cardboard Look Like Wood
Step 1: Cut Your Cardboard
First, cut the cardboard into a suitable shape. You can either draw the shape freehand or with a pencil first. After cutting out the basic shape, you can start adding details, such as angles or curves. To give your wood grain additional texture, you can also cut out little patterns or designs.
It’s best to start small and work with a few cardboard pieces of various sizes and shapes. Your wood grain will appear more realistic the more you have. Having some extra cardboard on hand is also a good idea in case you make any mistakes.
Step 2: Use a Paintbrush
After cutting out the shape, paint a layer of brown using a paintbrush. Any shade of brown will work, but a dark brown will give the impression of real wood. Before proceeding to the following step, let the paint completely dry. For optimal effects, it is recommended to let the paint dry overnight. To speed up the drying process, you might try a hair dryer on the low setting. Before continuing, it’s crucial to ensure that the paint is completely dry. The wood grain effect will be ruined by coated wet paint.
Step 3: Apply Black Paint
Use a black paintbrush to add black paint streaks between the brown paint strokes once the brown paint has dried. This is where you can get creative, just make sure you apply the black paint sparingly enough to allow the brown paint to show through. For a more natural look, you can also blend the black paint with a paper towel or piece of cloth. It’s crucial to keep in mind that wood grain patterns are imperfect, so if your lines aren’t precisely straight, don’t worry. Real wood reference photos can serve as a source of ideas and direction.
Step 4: Add Texture
You can add even more realism by adding texture to the paint with a paper towel. Just press the paper towel onto the cardboard after dipping it into the wet paint. This will produce an authentic raised wood grain effect! To create the illusion of more natural wood, you can also use the paper towel to soften any sharp edges or lines. Working in small sections at a time is the best way to prevent the paint from drying out before you can blend it. You can choose how much texture you want to add, but keep in mind that real wood grain isn’t perfectly smooth.
Step 5: Allow the Paint to Dry
After you are satisfied with how your cardboard looks, let the paint dry. This can take a few minutes to several hours, depending on the paint you used. Your cardboard will resemble wood after the paint dries! To add more texture or to deepen the color, you can also apply a second coat of paint. It’s not required, but it can improve how realistic your wood grain looks.
To get a more authentic wood look, you can also use various tones of brown and black paint. Everything is dependent upon your desired appearance and personal taste. To make your cardboard look more polished and to protect it, you can even apply a coat of varnish.
Step 6: Apply a Clear Finish
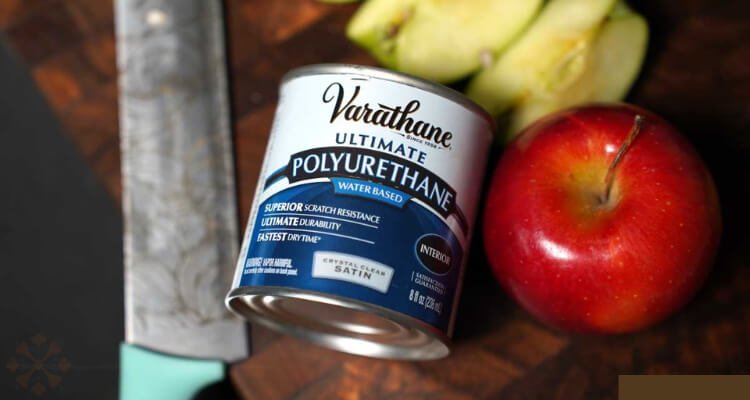
You can use a clear finish to give your cardboard the appearance of real wood. This will help to preserve the paint and give it a glossy, wood-grain look. Most hardware stores carry clear finishes. As directed by the manufacturer, apply the finish using a paintbrush.
In order to prevent color blending or smudging, it is advisable to complete this step after the paint has completely dried. Additionally, the clear finish will protect your cardboard and increase its durability for any upcoming projects. As an additional quick and simple method of protecting your cardboard, you can use a clear spray sealant.
Step 7: Add a Final Coat of Black Paint
Apply one last coat of black paint for a more worn-in appearance. This will produce a wood effect that is more subdued, making it ideal for shadow box or picture frame projects. Before using the black paint on your project, apply a thin layer and let it dry completely. For a more natural look, you can also blend the black paint with a paper towel. Don’t skip the final coat of black paint—it will make your wood grain look more realistic! The key is to experiment until you find the ideal ratio of textures to colors.
Step 8: Create a Wood Grain Pattern
You can draw a wood grain pattern on your cardboard with a pencil to give it an even more realistic appearance. This will give the wood effect more depth and realism and make it appear more authentic. Since the grain of the wood is not uniform, it is best to sketch lightly. You can get ideas from images of actual wood as well. Although optional, this step can give your project a polished look in the end. Remember that wood grain designs are not perfect, so don’t worry if your lines aren’t straight or centered, even though it may seem intimidating at first.
Step 9: Cut Out Shapes or Designs
Use scissors to carefully trim out the desired shape if you want to make a specific design or design on your cardboard. This is a fantastic method to give your project a personalized touch and make it stand out. For greater accuracy, you can also lightly sketch the shape with a pencil before cutting it out. This step can give your cardboard wood piece a playful and artistic touch, but it’s optional and dependent on your project. To achieve a realistic wood look, make sure you adhere to the same painting and texture-applying procedures.
Step 10: Display Your Project!
Show off your project to the public once you’ve finished all the steps! Whether you’re making a shadow box, picture frame, or any other craft, your cardboard will now have the appearance of genuine wood. Your new wood piece can be used for any project you have in mind, as a gift, or as home décor. There are countless options! Always remember to have fun and try out various methods to get the most realistic-looking wood grain.
There’s no end to what you can create now that you know how to make cardboard appear like wood. Whether you’re creating a picture frame, furniture, or a sign, using this technique will make your work look realistic and well-made. So start thinking creatively and crafting.
Some Tips and Suggestions:
1. Apply a thicker coat of black paint if you’d like to see more of the wood grain.
2. Include some white paint in the mixture for a more worn appearance.
3. Before you begin painting, try giving the cardboard a quick primer spray if you’re having problems getting the paint to adhere.
4. Don’t be scared to try out various color combinations! Use different paint colors to achieve different wood effects.
5. Use a wood grain tool to create the texture if you want to add even more realism. These tools are available at most craft stores.
6. Keep in mind that you must wait for the paint to dry completely before proceeding to the next step. In any other case, your paint might get streaks or smudges.
7. After the paint has dried, consider using a clear sealer to achieve a high-gloss finish. This will make your project appear realistic and professional.
Additional Techniques to Give Cardboard a Wood Look:
1. Using a Wood-burning Tool
You can use a wood-burning tool to give your cardboard a more realistic appearance. This will make your cardboard look like real wood around the edges.
2. Applying paint
Painting cardboard is an additional technique to give it the appearance of wood. Depending on the style you want, you can use either light brown paint or dark brown paint. For a more realistic appearance, make sure the paint has some wood grain texture added to it.
3. Using Wood Stain:
Another fantastic technique for giving cardboard a wood appearance is wood stain. After applying the wood stain to the cardboard, use a fresh cloth to remove it. As a result, the cardboard will have a realistic wood grain appearance.
4. Using Wood Glue:
You can use wood glue to give your cardboard a more durable wood look. After covering the cardboard with wood glue, press on some wood veneers. Before utilizing your project, let the glue dry completely.
5. Using Chalk Paint:
A wood effect can also be achieved with chalk paint. This kind of paint will make your cardboard appear worn-out and distressed. After covering the cardboard with chalk paint, distress the edges with sandpaper.
6. Using Brown Paper:
Brown paper can be used to achieve a more soft wood effect. After cutting the brown paper into strips, adhere them to the cardboard’s surface using glue. Before utilizing your project, let the glue dry completely.
7. Using Washi Tape:
Another fantastic way to give your cardboard furniture some design is with washi tape. It can be used to add words and phrases, patterns, or stripes to your work. Just watch out that using too much washi tape might make your furniture appear crowded and busy.
8. Adding Fabric:
You will can glue fabrics to the cardboard to give your project some texture. Apply an effective glue, like hot glue, to ensure the fabric doesn’t peel off easily. If you want a stronger connection, you can also attach the fabric to the cardboard.
9. Using Crayon Resist:
Crayon resist can be used to add a distinctive wood grain effect. First, use a dark brown crayon to color the cardboard’s surface. Then, add wood grain texture with light brown paint. The paint will be resisted by the crayon, giving the appearance of genuine wood grain.
10. Adding Beadboard:
One very common type of wainscoting is beadboard. You can use thin wood strips that have been cut and glued to the surface of your cardboard to add beadboard. Use a router to make the groove between the wood strips to achieve the appearance of genuine beadboard.
A Few Tips for Creating a Wood-Looking Cardboard:
1. Pick the Right Type of Cardboard:
The correct kind of cardboard must be used if you want your cardboard to resemble wood. Overly thin cardboard will be challenging to work with and won’t produce the desired result. Conversely, excessively thick cardboard will be challenging to cut and might not work well for your project. Alternatively, search for medium-weight cardboard that is easily cut and sturdy enough to maintain its shape.
2. Consider the Colour of Your Cardboard:
The final project’s realism will also be influenced by the color of your cardboard. Look for pale cardboard if you want it to resemble light-colored wood. Select cardboard in a deep color to create the illusion of dark wood. Additionally, cardboard that had been dyed to resemble wood grain is available.
3. Cut Your Cardboard Into the Right Shapes:
You must cut your cardboard into the appropriate shapes if you want it to resemble wood. Cut your cardboard into long, thin strips to begin. These strips are going to be your wood’s “boards.” To get a more realistic wood grain effect, you can then chop these strips into smaller pieces.
4. Attach Your Cardboard Pieces:
It’s time to attach the pieces once you’ve cut your cardboard into the desired shapes. You can use tape, glue, or other adhesives for this. Make sure the glue you use is strong enough to keep the cardboard together, particularly if there will be stress or weight involved in your project.
5. Paint or Stain Your Cardboard:
It’s time to paint or stain your cardboard after it has been cut and attached. Use dark paint or stain to give your cardboard the appearance of stained wood. Use light-colored paint or stain for a more organic-looking wood finish. Additionally, you can play around with various hues and tones to give your project a distinctive appearance.
Does this technique really work?
It’s very easy to make cardboard look like wood, and the results can be surprisingly lifelike. For that reason, this is a project that is well worth considering if you’re looking for a low-cost way to give your decor a little more warmth or charm.
We hope this blog post has been useful in explaining how to make cardboard appear like wood. Without spending a fortune, you can add a rustic touch to your house with a little time and effort. Have you ever attempted to replicate the look of wood in projects using cardboard? What produced did you? Post your ideas in the comments section below!


