Do you ever think that something artistic is missing from your workspace? People are searching more and more for distinctive and personalized ways to show off their personalities in the areas where they spend the most time. Paint corkboard with vibrant colors or patterns is a common method for accomplishing this.
Not only does it look amazing, but it’s also an inexpensive way to bring some color into a room that might otherwise feel dull or colorless.. We’ll show you exactly how to paint a corkboard in this blog post, enabling you to use any surface to express your unique style. Now let’s get going!
Why Would You Want to Paint a Corkboard?
1. To Go With The Style of Your Room
Corkboard painting is a good idea if you want it to blend in with the rest of your room’s design. Even if you’ve taken the time to decorate your room, a plain corkboard can occasionally look out of place or boring on a wall. In addition to making your corkboard blend in perfectly, painting it a color that matches or complements the rest of your room will give it a unique touch.
2. To Add Customization
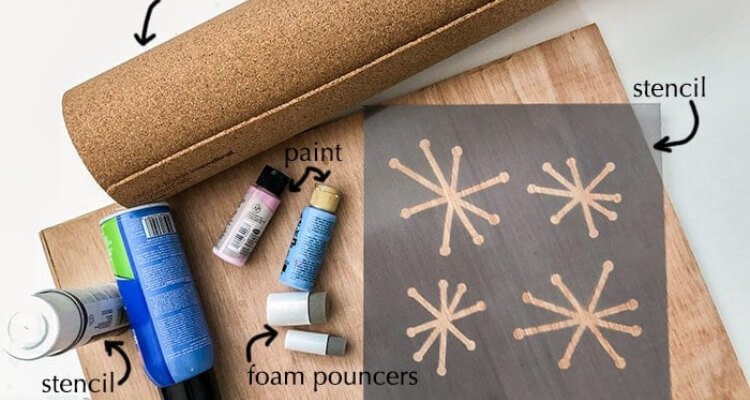
You can frequently use a corkboard to hold notes, pictures, and other little objects that hold special meaning for you. By painting, you can further personalize your corkboard to reflect your interests and personality. For an added personal touch, try experimenting with different colors, patterns, or even stencils. This will turn your corkboard into a beautiful accent piece for your space in addition to being useful.
3. To Update an Old Corkboard
The same simple corkboard may begin to appear boring and worn out if you have it for a long time. Painting it can give it an entirely new appearance and make it appear like a brand-new board. This is also a fantastic way to give an outdated corkboard in your space a new lease on life and use.
4. To Establish a Main Idea
You can use a painted corkboard as the center of attention in your room or on your wall. You can draw attention to and make your corkboard stand out by using striking colors or patterns. This is a fantastic, low-cost way to give your room visual interest and personality.
5. To Make Sure Children Have Fun
The Painting a corkboard can be a fun project to do with your kids if you have any. You can let them express their creativity by letting them pick the colors and layout. Another enjoyable addition to a playroom or sleeping area is a painted corkboard, which gives it a personalized touch and increases your child’s desire to use it.
Six Simple Steps for Painting a Corkboard
Step 1: Select Materials
Make sure you have all the materials you’ll need to paint your corkboard before you start. These are:
- Corkboard
- Primer
- Paint of your choice (acrylic or latex)
- Paintbrushes
- Painter’s Tape
- Sandpaper
Step 2: Get the Surface Ready.
When painting any surface, including a corkboard, preparation is essential. To create a smooth and even surface for painting, start by lightly smoothing the entire corkboard. Additionally, it will improve the adhesion of the paint and primer.
Step 3: Get the corkboard ready.
Priming is an essential step in painting a corkboard. It guarantees improved paint adhesion and aids in sealing and shielding the porous surface of the cork. Apply the primer evenly across the corkboard’s surface using a foam brush or roller.
Step 4: Select Your Paint
You can paint your corkboard using either latex or acrylic paint.Compared to acrylic, which is water-based and dries faster, latex is an oil-based material and takes longer to dry.You can use any kind of paint on a corkboard—just use your preferred kind.
Step 5: Paint Your Corkboard
It’s time to paint your corkboard once the primer has completely dried. Use a foam roller or brush to apply paint evenly. You may need to use several coats of paint, depending on the color and kind you choose. Please allow the previous coat to dry completely before applying the next.
Step 6: Add final details
Your painted corkboard can have some fun and artistic finishing touches added to it, like a border or engraved designs. Painter’s tape is an essential tool for producing crisp lines and preventing smudging. Before using your freshly painted corkboard, let the paint dry completely after making any last adjustments.
Some Additional Advice on Painting a Corkboard
1. Sanding Is Not to Be Missed
Sanding the corkboard before painting will give you a smoother surface and improved paint adhesion. Use a sanding block or fine-grit sandpaper to lightly sand the corkboard’s surface. This will remove any rough areas or imperfections on the corkboard in addition to improving the paint’s adhesion.
2. Using a Primer
It is advised to use a primer first if you are painting over a corkboard that has a lot of pattern or darkness. This will shield the paint color from previous patterns or colors and make it appear more vibrant. It is important to adhere to the primer’s instructions and let it completely dry before painting with the color of your choice.
3. Select the Correct Paint Type
Acrylic or latex paints are usually suggested when painting a corkboard. These paints have a smooth finish and stick to the cork well. Spray paint should not be used since it will quickly permeate the porous material cork material and leave an uneven surface.
4. Apply Multiple Coats for Optimal Effects
Applying multiple coats of paint is preferable to applying one thick coat to achieve a solid and uniform color. Before adding the next coat, let the previous one completely dry. Also, paint lightly to prevent drips and streaks.
5. Use Patterns and Designs Creatively
Why not use some imagination and add some patterns or designs to your corkboard instead of just painting it a single color? To make a distinctive and customized corkboard, use stencils, tape, or even freehand drawing. Don’t be scared to try out various colors and methods.
6. Let the Paint Dry
It is advised to apply a clear sealer to the painted corkboard to prevent paint chipping or peeling. Additionally, this will make the corkboard glossy and easier to clean.
7. Allow to Dry Totally Before Using
Make sure to give your corkboard enough time to dry completely before using it after painting and sealing it. Depending on the paint type used and the humidity level in your area, this could take anywhere from 24 to 48 hours. Your freshly painted corkboard is ready to be used for all of your organizing needs once it has completely dried. So feel free to confidently hang up those notes, photos, and reminders! Have fun with your paintings!
Frequently Asked Questions
What Safety Measures Should I Follow When Painting a Corkboard?
To guarantee the best outcome, there are a few steps you should take before painting a corkboard. First and foremost, use a damp cloth to wipe down your corkboard to ensure that it is clear of any dust or debris. As a result, there will be an uneven finish and improper paint adhesion.
Don’t forget to cover the corkboard’s non-painting areas, like the frame and any metal hardware. Painter’s tape or newspaper work well for this.
Which Kind of Paint Is Best for Me?
Regarding painting a corkboard, you have a few different paint types to choose from. The most popular and advised kind is acrylic paint. It has a smooth finish, dries fast, and is water-based. For a different look, you can also use chalkboard paint or spray paint. Just be sure to read the labels and select the one that is suitable for the task at hand.
Does Painting the Corkboard After Primer?
Although priming a corkboard before painting is not required, it can improve paint adhesion and produce a more uniform finish. In the event that you decide to prime the corkboard, use a primer that is right for both wood and metal surfaces.
How much paint coat do I need?
The type of paint and color you’re using, as well as the final result you want, will determine how many coats of paint you need. Typically, a solid and even finish requires two coats of paint. Prior to applying the second coat, make sure the first coat has had time to completely dry.
SUMMARY
All things considered, painting a corkboard need not be a difficult undertaking. You can accomplish remarkable results with minimal effort if you have the right resources, including the right tools and materials, and take the appropriate precautions.
Ultimately, adding personalized artwork to your corkboard can enhance its color and vibrancy in any room it is placed in. Why not give stenciling or decoupage a try next, if these tips have piqued your interest in design and decorating?
You are now expert in painting 1corkboards! Give your creativity some time to bloom, and you’ll become an expert at do-it-yourself projects quickly! So start gathering supplies, make a draft of what you want to create, and when it’s all done, show off your work because we know you’ll be happy with the outcome.


